587/7
How to Cross Stitch: A Beginner's Guide to Counted Cross Stitch
Counted cross stitch needs only fabric with a visible grid, a blunt needle, some floss and a chart. Here is how to set up, make the first stitches and finish a piece neatly.
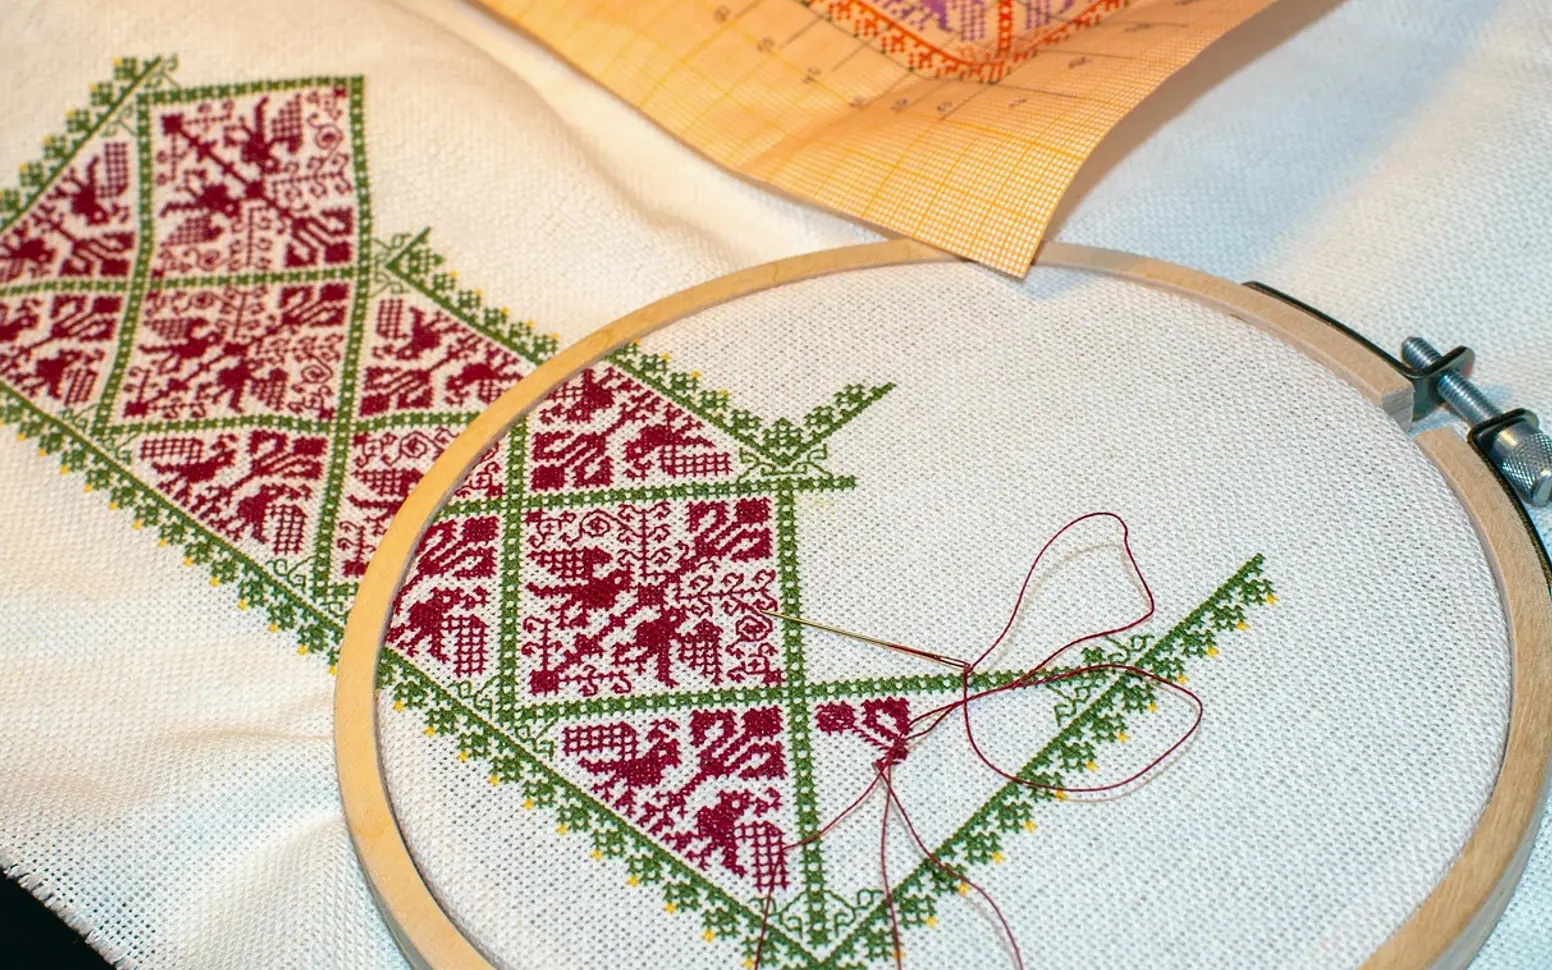
Cross stitch is a form of embroidery in which small X-shaped stitches are worked over a fabric grid, following a chart where each square stands for one stitch. Counted cross stitch, the most common type, uses blank fabric and a printed chart; you count squares to know where each colour goes. With a starter piece, a hoop and a quiet evening, most people finish their first small motif within a few sessions.
Counted, stamped and how it differs from other needlework
In counted cross stitch the design lives on paper and you transfer it by counting. In stamped cross stitch the pattern is printed directly onto the fabric, so you simply stitch over the marks. Stamped kits are easier to begin with; counted work is neater and more flexible once you are comfortable.
| Craft | Base | Stitches | Look |
|---|---|---|---|
| Cross stitch | Aida or evenweave with a clear grid | Mostly Xs, plus backstitch outlines | Pixel-like, tidy blocks of colour |
| Needlepoint | Stiff open-mesh canvas | Tent and other canvas stitches, usually in wool | Dense, fully covered surface |
| Freehand embroidery | Plain woven cloth | Many surface stitches worked freely | Lines, texture and shading like drawing |
What you need
- Aida fabric. A stiff cotton cloth woven with visible holes. Its "count" is the number of squares per inch: 14-count is the usual starting point, 11-count gives larger squares that are easier on the eyes, and 16- or 18-count produces finer, smaller designs.
- Stranded cotton floss. Each length is made of six thin strands that you separate. On 14-count Aida, two strands are typical for cross stitches and one for backstitch.
- A tapestry needle. Blunt-tipped, so it slips through holes without splitting threads. Size 24 suits 14-count; size 22 suits 11-count.
- A hoop or frame to hold the fabric taut.
- Small sharp scissors and the chart, which shows each colour as a symbol with a key listing the floss numbers.
- Good light. A bright, adjustable lamp makes counting much easier; directional fixtures like those in our piece on track lighting at home work well over a craft chair.
Set up the fabric
- Cut the Aida a few inches larger than the finished design on every side, leaving room for framing.
- Fold it in half both ways and pinch the folds to find the centre. Most charts mark their centre with arrows on the edges.
- Place the fabric in the hoop and tighten until it feels like a drum, without stretching the grid out of square.
Starting at the centre of both the chart and the fabric keeps the design from drifting off the cloth.
Start without a knot
Knots create lumps that show through when the piece is framed. Two clean alternatives:
- Loop start (for an even number of strands): take one strand twice as long as usual, fold it in half and thread both cut ends through the needle. Bring the needle up from the back, make the first half stitch, and pass the needle through the loop waiting on the back. The thread is now anchored.
- Tail start: leave a short tail on the back and hold it in place so your first few stitches cover and secure it.
Work with a length of roughly forearm size. Longer threads tangle and wear thin as they are pulled through the fabric again and again.
Make the stitches
A full cross stitch is two diagonal half stitches. Bring the needle up at the bottom left of a square and down at the top right, then up at the bottom right and down at the top left. Two methods are common:
- Row method: work a line of half stitches in one direction, then return along the row to complete the Xs. Fast for large areas of one colour.
- One at a time: finish each X before moving on. Better for scattered single stitches and diagonal lines.
Whichever you choose, keep the top diagonal pointing the same way across the whole piece. It is the single habit that most improves the finished look.
Backstitch and fractional stitches
Many charts add outlines in backstitch, worked after the Xs with a single strand along the edges of the squares. Some designs also use quarter and three-quarter stitches to soften curves; leave those for a second or third project if they feel fiddly.
Finish your threads
When a thread runs short or a colour section ends, slide the needle under four or five stitches on the back and trim. Avoid carrying a thread across a long gap of empty fabric: on light Aida it shows through from the front.
Common beginner mistakes
- Pulling stitches too tight, which distorts the grid and pinches the fabric.
- Letting floss twist; drop the needle and let it dangle every so often to untwist.
- Miscounting at the start of a new area. Count twice, stitch once.
- Stitching over the hoop's edge mark and leaving a crease. Remove the hoop between sessions.
Finishing the piece
Hand-wash the finished work gently if it has picked up marks, roll it in a towel, then press it face down on a soft towel so the stitches are not flattened. Frame it, mount it in the hoop as a display, or sew it onto a cushion or bag.
Questions beginners ask
Is cross stitch relaxing?
Many people treat it as a slow, screen-free way to wind down, because the repeated motion asks for attention without much pressure. It sits well beside other quiet routines such as keeping a journal.
What should I learn next?
Once Xs feel easy, freehand stitches open up lines, flowers and lettering on any fabric. Our guide to basic embroidery stitches covers the ones most worth learning first.
Across the sections
Spotted a mistake?
A short note is enough.
Before you cut
How much Aida does this chart need?
Type the stitch count from the chart's edges, pick your fabric count and the spare border you want around the design. The sizes update as you go.
Stitched size is the stitch count divided by the fabric count; the cut size adds your border on all four sides. The guide above suggests a few inches each side so there is room for framing. Hand-dyed or evenweave cloth can run slightly off its stated count, so measure a test inch if the fit is tight.